Promote Your Online Courses with Live Webinars: Seamless Integration with Zoom

Do you want to boost your online course sales? One simple way to do this is to host live webinars. Interact with your target audience in real time, show that you’re an expert in your field, and inspire your attendees with your charisma. This will help you build trust with your prospective customers, which will make selling much easier.
We’re happy to announce that iSpring Market is integrated with Zoom, the powerful video conferencing service. So you can start hosting live webinars, generating leads, and moving customers through the sales funnel right now.
Seamless integration with Zoom allows you to enhance your live meetings with HD video, presentations, screen sharing, and chat. Your participants can join a webinar from any device and watch its recording later if they’re busy or wish to review. You can invite any users from your database and those newly registered for the event. iSpring Market will automatically notify them about the meeting.
Read on to find out how to set up a webinar in iSpring Market.
Step 1. Connect to Zoom
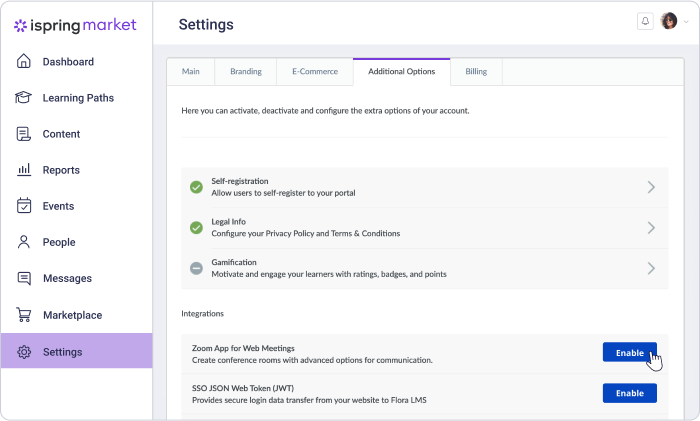
To host webinars in iSpring Market, you need to enable Zoom. Go to the Settings → Additional Options and in the Integrations section, next to Zoom App for Web Meetings, click Enable.
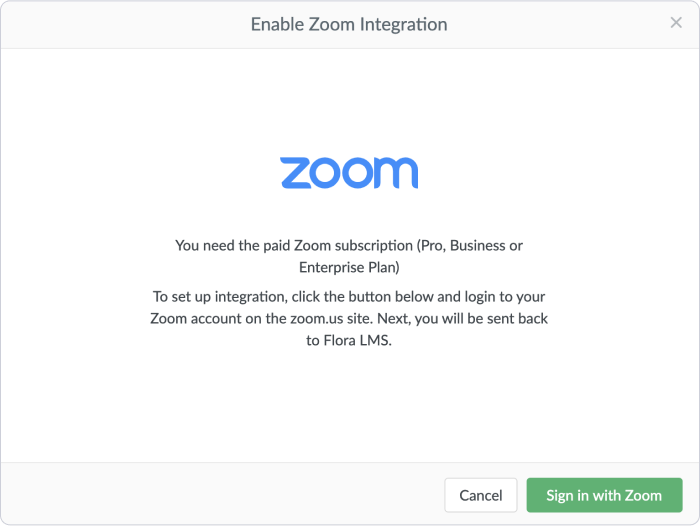
In the opened window, click Sign in with Zoom.
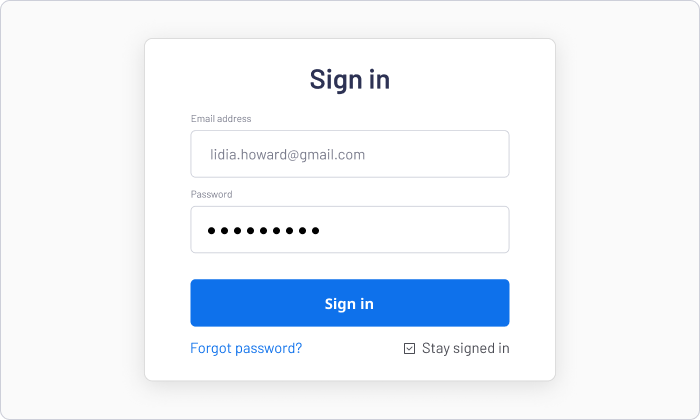
You will be redirected to Zoom’s authorization page. If you already have a Zoom account, enter your email and password and click Sign in.
If you don’t have an account yet, create it now. After you sign up, you need to get the paid subscription — choose the Pro, Business, or Enterprise membership plan.
Note: With the Basic free plan, webinars won’t work.
Now that you have connected Zoom to your iSpring Market account, you can move on to creating web meetings.
Step 2. Create a Webinar
Open the Events section and click on Add and choose Web meeting in a drop-down list.
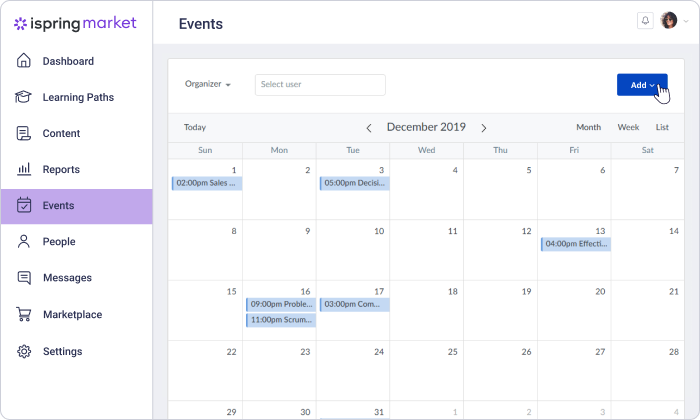
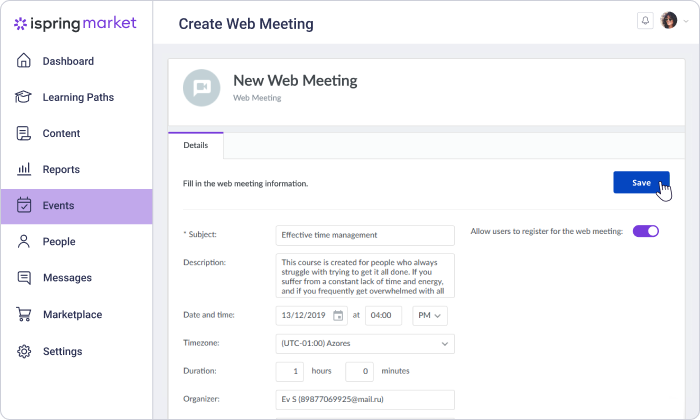
Fill out the information regarding the upcoming event and set up notifications for participants. Check the box Allow users to register for the web meeting to make the sign-up form accessible on your storefront for anyone who wants to attend it. Then click on Save. After that, your scheduled event will appear in your calendar.
Step 3. Invite Participants
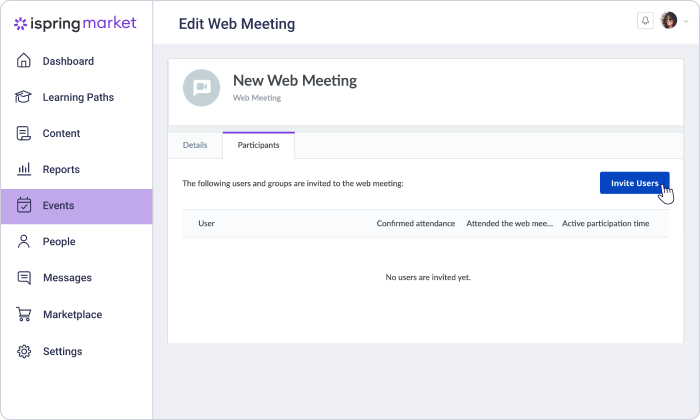
After you hit the Save button, you’ll have a new Participants tab on the Edit Webinar page. Go to this tab and click Invite Users.
You can enter participants’ names and emails, or choose the complete groups of users. On this page, you can also customize the notification that will be sent out to the webinar attendees.
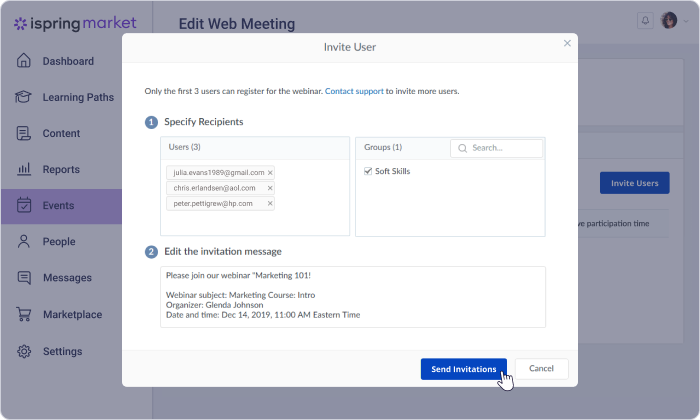
Users will get invitations in their iSpring Market accounts and to their email address if it is specified in their profile.
Those invited to the webinar will appear under the Participants tab.
Step 4. Launch a Webinar
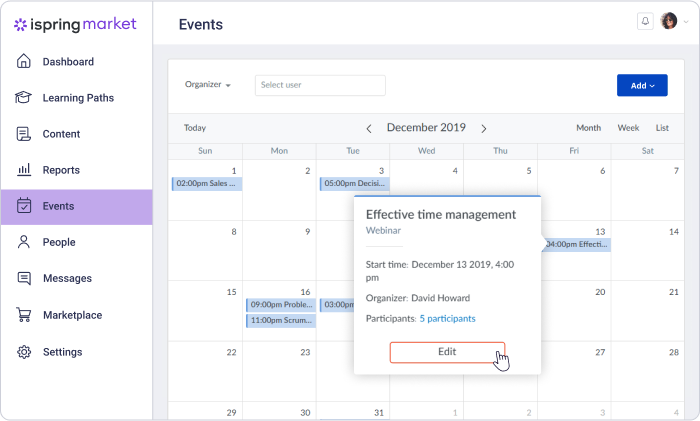
Let’s say the start time for your webinar has come, and soon, you’ll have a chance to interact with your audience in real time. To run a webinar, go to Events, choose the webinar in the calendar, and hit the Edit button in the opened window.
On the Edit Webinar page, click on Start.
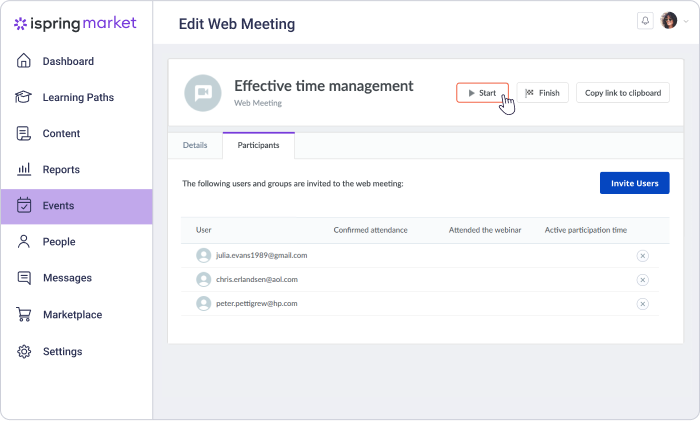
By hitting the Finish button on this page, you can also end a webinar when it comes to a close.
Step 5. Hold a Webinar
Zoom allows for a lot of great options for hosting webinars. You can learn all about its features on the website and find detailed instructions on how to work with an app on the Youtube channel.
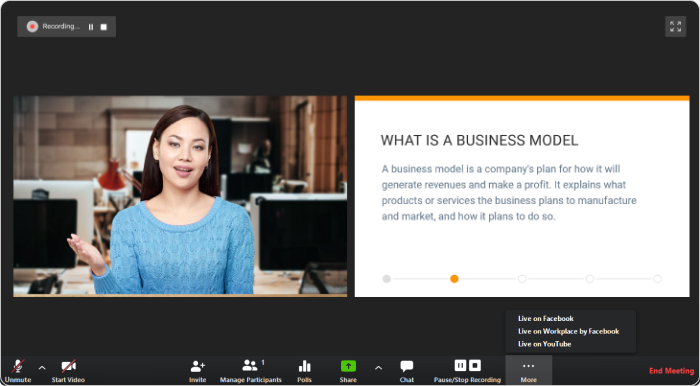
Here, we’ll just outline the main options Zoom offers:
- Manipulate audio and video by hitting the Mute/Unmute and Start/Stop Video buttons.
- Click on Polls, add questions, and get instant feedback to make your webinar more interactive.
- Share your screen, a whiteboard, any active application, or files with your participants with the Share button.
- Select Chat on the application console to see attendees’ messages. As the host, you can choose who the participants can chat with or completely disable the chat.
- The webinar recording will start automatically. However, you can pause and restart it or fully stop the recording whenever you need it. The recording will save as an MP4 file and will be downloaded to your computer after the session is over.
- To stream a webinar live to Facebook and/or Youtube, click on More and select the needed option.
- Finish the session right in iSpring Market or in the Zoom app itself. In the latter case, simply click End Meeting.
You can use your webinar recording as a complete online course. For example, you can upload it to your storefront and offer for free as an incentive for your customers.
Do you want to start selling courses online, but you still don’t have an iSpring Market account? Sign up for iSpring Market 14-day trial right now.
